As the name suggests, Internet Connection Sharing is a long-standing feature of Windows 10 that lets you share an Ethernet port internet connection with multiple devices.
Even though a network switch is usually used to connect devices to the internet, there are situations when you might not have enough ports or a long enough cable to complete the connection. Thus, Windows 10’s Internet Connection Sharing function enables you to connect other devices to the internet.
The mobile hotspot feature is comparable to this. However, the distinction is that while utilizing the mobile hotspot feature, sharing takes place through a WiFi adapter, whereas when using the Internet Connection Sharing feature, sharing takes place using an Ethernet or WiFi adapter.
This post will teach you how to use Windows 10’s built-in Internet Connection Sharing feature to share an internet connection with multiple devices. Two network adapters are needed for this procedure: one for the internet connection and another for granting other devices access to the connection.
Share internet through Ethernet on Windows 10
Follow these instructions to share an Ethernet internet connection with other Windows 10 devices:
Windows 10’s OpenSettings.
On Network & Internet, click.
Select Status.
Click the “Change adapter options” button under the “Advanced network settings” section.
Modify the adapter settings
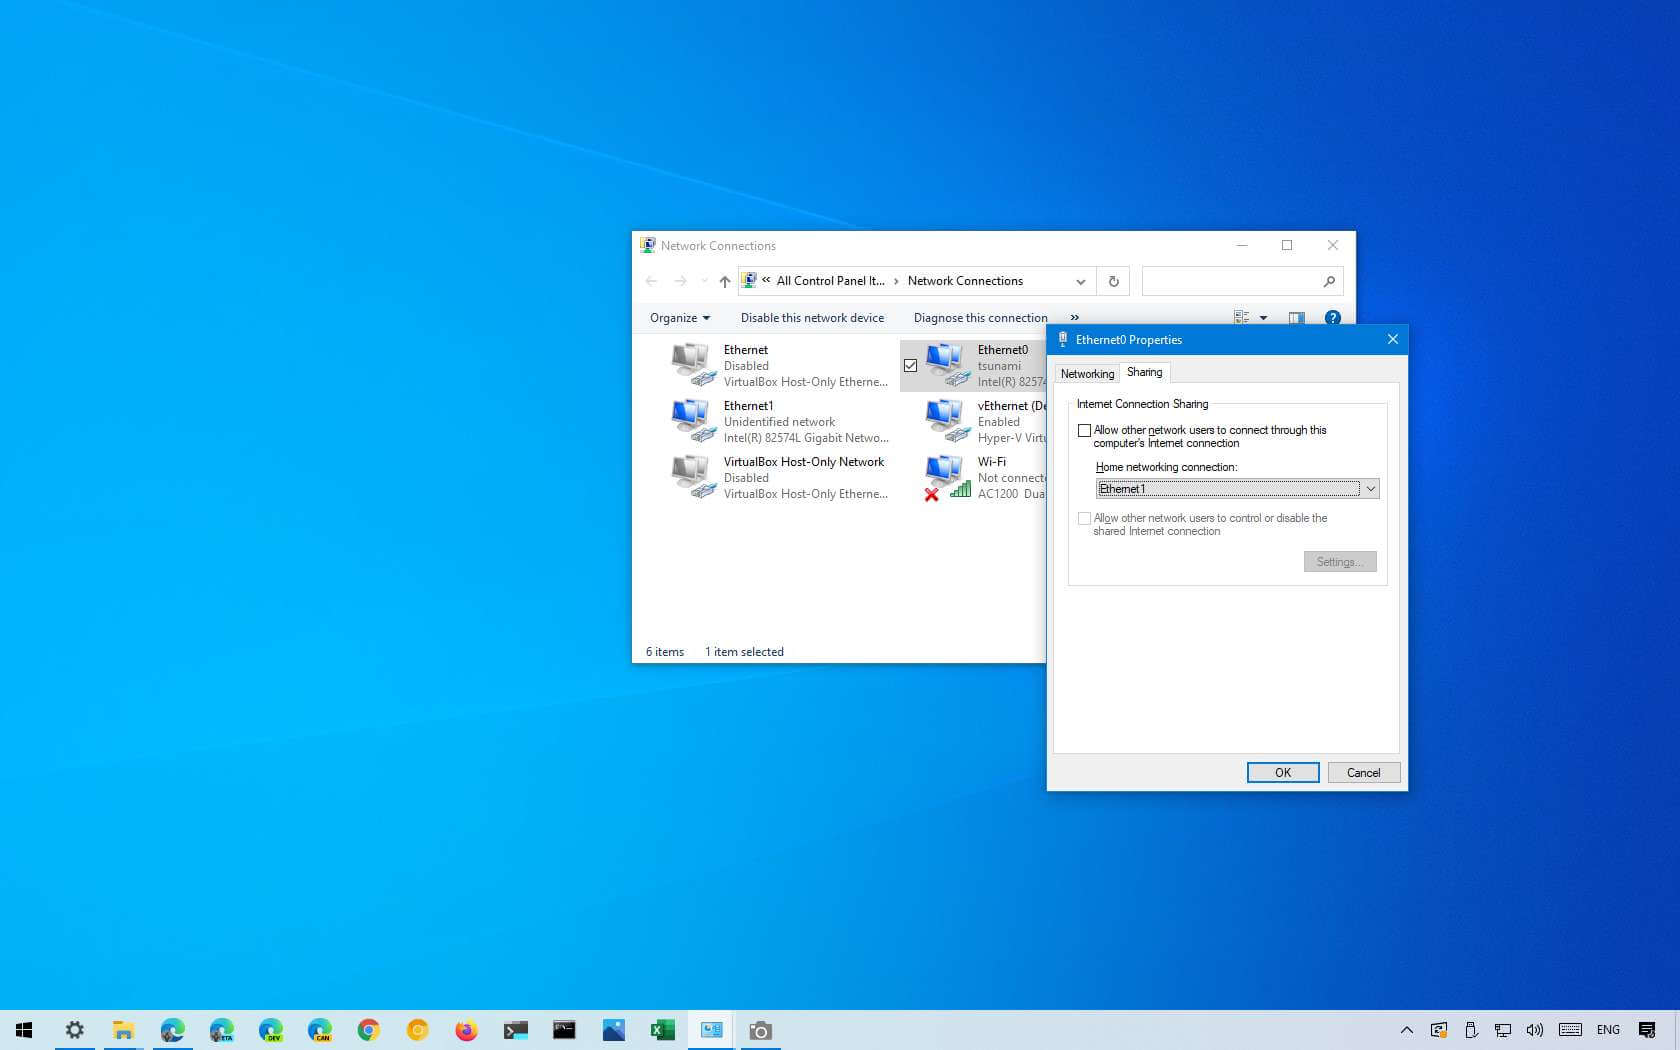
In Windows 10, right-click the adapter that has the internet connection you wish to share, then choose the Properties option.
On the Sharing tab, click.
Verify the option to let other network users connect using this computer’s internet connection.
Turn on the Internet Sharing Connection.
The second Ethernet (or WiFi) network adapter that other devices will use to access to the internet can be chosen using the Home networking connection drop-down menu.
Just a quick reminder that choosing a WiFi adaptor essentially activates a mobile hotspot.
(Optional) Empty theGive other users of the network the ability to manage or turn off the shared internet connection.
Press the “OK” button.
After completing the procedures, connect the network switch or device to the Ethernet port to enable internet access. The devices involved in internet sharing will automatically negotiate a private IP address because there isn’t a DHCP server to provide networking parameters. If you’d like, you may set up a distinct static TCP/IP address for every device.
Although Windows 10 is the main emphasis of this guide, Windows 11 and previous versions, such as Windows 8.1 and Windows 7, can also utilize this functionality.