Although you can always use the mouse to resize the
Windows Terminal
console, you can change the settings manually to set a new default height and width every time you launch the command line experience.
The option is available from the
Startup
settings, and they will apply for all profiles, including for Command Prompt, PowerShell, WSL, and others.
In this
guide
, you will learn the steps to adjust the size of the new command-line experience on
Windows 10
.
-
Change Windows Terminal default size using Settings UI
-
Change Windows Terminal default size using settings.json
Change Windows Terminal default size using Settings UI
Use the following steps to increase or decrease the width and height of Windows Terminal:
Open
Start
on Windows 10.
Search for
Windows Terminal
and click the top result to open the console.
Click the down-arrow button next to the console tab.
Select the
Settings
option.
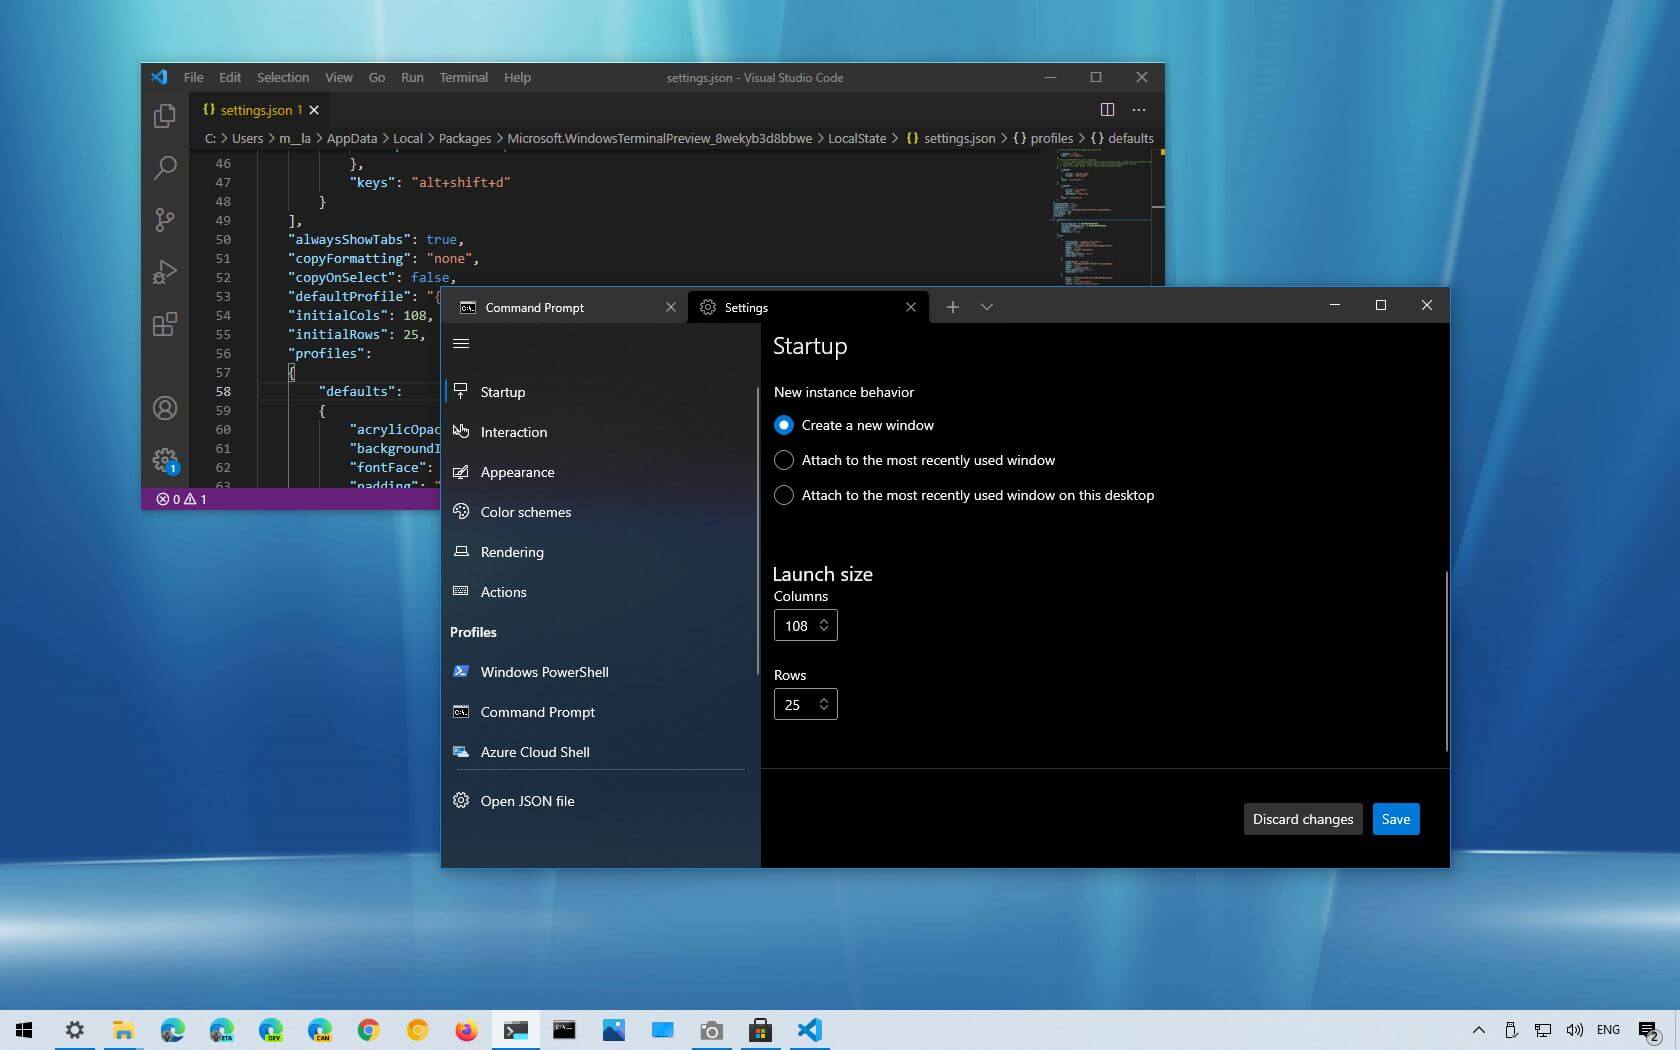
Click on
Startup
.
Under the “Launch size” section, use the
Columns
option to
adjust the width of the Windows Terminal
.
Under the “Launch size” section, use the
Rows
option to
adjust the height of the Windows Terminal
.
Click the
Save
button.
Once you complete the steps, reopen the console to see the new startup size.
Change Windows Terminal default size using settings.json
Use the following steps to change the default launch size of the Terminal:
Open
Start
.
Search for
Windows Terminal
and click the top result to open the console.
Click the down-arrow button next to the console tab.
Select the
Settings
option.
Click on Open JSON file.
After the “actions” bracket, type the following command to change the size of the window:
Use the
Ctrl + S
keyboard shortcut to save the file.
After you complete the steps, the command-line tool will now use the size of the window you specified.