In addition to safeguarding your information from hardware failure, Windows 11’s Storage Spaces feature gives you the freedom to increase the maximum volume size within a pool to any size you choose at any time.
You can increase the amount of storage that is accessible by using the Settings app and Control Panel if you previously added a new drive to the pool and created a space in Storage Spaces.
This post will teach you how to increase a volume’s capacity in Windows 11’s Storage Spaces.
-
Extend volume in Storage Spaces with Settings
-
Extend volume in Storage Spaces with Control Panel
Extend volume in Storage Spaces with Settings
In Windows 11, use the following actions to increase a volume’s capacity:
OpenSettings on Windows 11.
Select “System.”
On the appropriate size, click the Storage page.
Select “Advanced storage settings” from the Storage management section.

To store spaces, click on it.
To increase the storage capacity of a place, choose it under the Storage Spaces section.
On the Properties button, click.

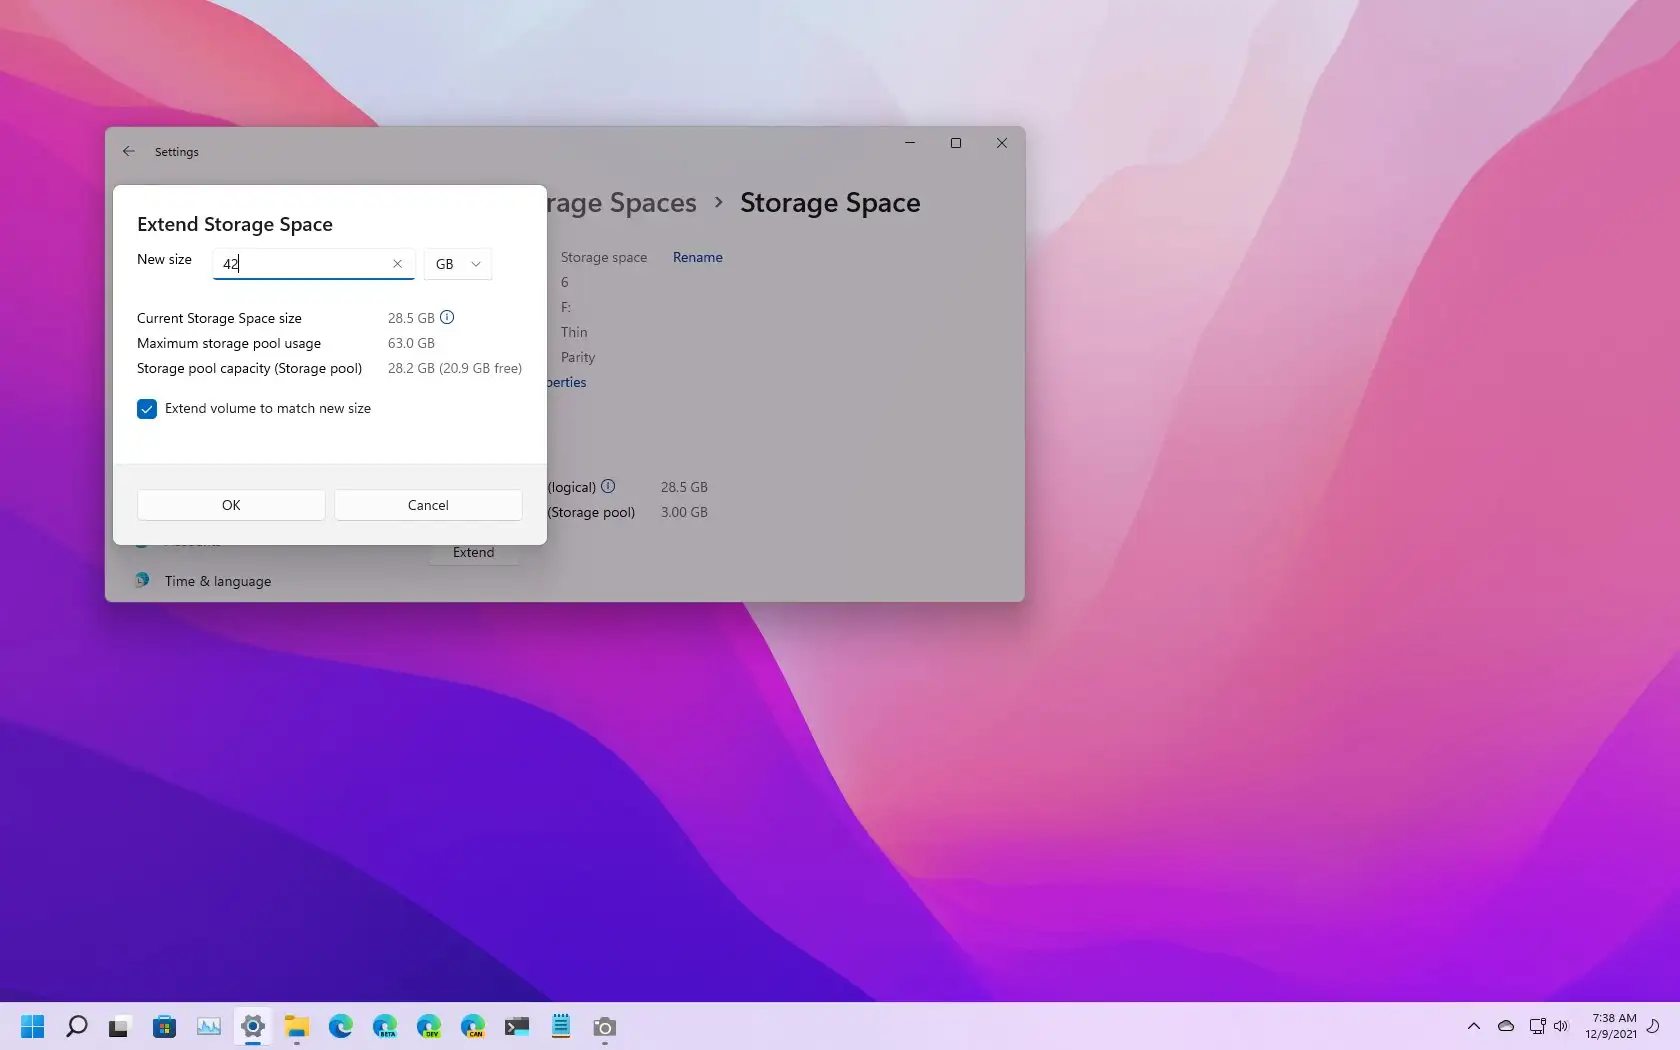
Click the “Extend” button under the “Size” section.

Choose from megabytes, gigabytes, or terabytes to represent the new size.

Verify that the extend volume corresponds to the new size.
Press the “OK” button.
The volume will now show the updated maximum storage capacity when you’ve finished the steps.
Extend volume in Storage Spaces with Control Panel
Use these procedures to increase the storage capacity in Storage Spaces with Control Panel:
Launch the Control Panel.
Select “System and Security.”
Select the choice for Storage Spaces.

Click the option labeled “Change settings.”
Click the Change option to increase the volume under the Storage spaces section.

Choose megabytes, gigabytes, or terabytes as the new maximum size.

Press the button labeled “Change storage space.”
The adjustments will be applied to expand the volume’s space to the new maximum capacity once you have finished the processes.